Showing posts with label cooking. Show all posts

Wednesday, June 26, 2013

RT: Quick and Easy Peasy

This one is right up my alley...
That's right it's time for my weekly Random Thursday post! 
you're meaghan me crazy

I love to cook and so this one might be just what i need to end my day (I am, of course writing this post on Wednesday night!) 


|one|
Dump Cake
This is so easy a gnat could do it! I don't have my own picture of one of my hand crafted beauties, but i am totally kicking myself, because i made a beautiful one the other night for some of our friends! 

But here are some links to some awesomeness! 
All Recipes: Dump Cake I & Blueberry Dumpcake (a little more prep, but still easy!)
And leave it to The Pioneer Woman to get it right: Dump Cake

Oh, BTW, it truly is a can of crushed pineapple, a can of pie filling (your choice of flavor), a boxed cake mix, and a stick of butter (melted). Add nuts if you feel nutty! And i swear one of the easiest and most delish dessert you will have with really noooooo fuss!

|two|

I found this in a cookbook and have added ground turkey to it.... check out my blog post about it! (link above)

                                                                                                                                             |three|
Flat Bread Pizza

Here's a sneak peak ... with a recipe to come on July 10th!  

What are your quick recipes? 
So much to cook and soooo little time! 
Check out other's quick recipes! 
you're meaghan me crazy
Photobucket

Monday, January 7, 2013

Snickerdoodle Yumminess

You may have seen that i was baking a few days ago! 

I have volunteered to make appetizers for our church service on Saturday nights one time a month. 
This time it was my turn to do a dessert and some sort of vegetable. 

The vegetable was easy: a veggie tray! 
But the dessert clearly needed to be made! 

This is one of those moments where Pinterest comes in handy! 
I definitely had a few options! 


I ended up choosing Snickerdoodle Bread! 
Source: lilluna.com via Simone on Pinterest

And here is my version! 
A few notes: 
- The recipe called for Cinnamon chips and they are a seasonal item. I must have missed them in the stores though i have never seen them before! I opted for white chocolate chips instead! this was a great option and way more readily available.
-The bread was perfectly moist! Loved that! I think it must have been the sour cream! 
- The recipe calls for it to be baked for 35-40 min. for mini loaf pans, but i do not own mini loaf pans. I used the larger loaf pans plus 2 more 8x8 pans! It took quite a bit longer for them to bake through. If you choose to use a different sized pan, just keep and eye on them. Mine took about 55 minutes a piece. I kept testing them with my knife to make sure the middle was done! 
- I highly recommend utilizing the "measure once, mix twice" rule that helps when baking more than one batch! This means i do end up with a few more dishes, but it helps with not having to measure the same thing twice. (Basically i measure out my ingredients in the order the recipe calls for and then measure the same ingredients into additional bowls! It makes the second batch go so much quicker!
- The white chocolate chips melted into the bread making it super yummy!  
-I cut up each loaf and put it on trays. There was all but 6 pieces left after church! Everyone loved it! I saw several people going back for more! 

Overall, this was a great recipe! 
I will be making it again! 

Today i am also participating in the GFC Blog Hop! 
Come and join in the fun! 
 
Photobucket

Saturday, November 3, 2012

Bubblin' and brewin'

Lots has been bubblin and brewing in my kitchen!
Thought i would share a recipe of my own too!

First was a Pinterest find: Zucchini Lasagna

Yum-o.
This recipe is great because it was pretty easy and it is lower carb! Though I love lasagna noodles, this recipe only calls for zucchini that has been grilled instead of the noodles! And I even served it to some men and they really liked it. Or at least I was told they liked it! Either way it is hubby approved! By the way, did I mention that this recipe is from The Girl Who Ate Everything?!? Love that blog! There is just a multitude to recipes to use everyday! I have several favorites from that site, but be sure to check out some of my other faves in case u missed it here!


This next recipe is one that I made up by myself. I am not usually testing my own recipes out just because the rarest many awesome ones to find on Pinterest! However, the morning I decided to make pancakes and realized I was it of a few key ingredients meant into to be creative! And that is how I decided that Greek yogurt would be a great exchange for eggs and milk! My recipe happened to be using a trader joes pumpkin pancake mix but I think u could use any mix really! I'll stop rambling and give you the recipe!
 
Greek Yogurt Pancakes

What you will need:
1 8 oz. container of Greek yogurt per batch of pancakes (Note: flavored yogurt would add flavor, but would also add sugar!)
Pancake mix (use as much as directed on the box for the amount of pancakes desired!)
Water
1 T butter, melted

Begin by measuring the powdered pancake mix and then mix in the yogurt. This might be thick to start, but you can add water to thin it out. Be careful not to add too much water as it will make the pancake batter too runny! Then mix in the melted butter. Once the mix is finished you can pour the batter onto the griddle.

Here's what my pumpkin version looked like! Those little guys were gobbled up lickety split! Yum -o!


These were a yummy breakfast treat! 


Photobucket

Saturday, February 25, 2012

How Do You Stuff Your Peppers?

Hi all! 

I know i have kind of been MIA the last couple days... So sorry! There have been a few reasons for that and one is I am just truly exhausted and ready to crawl into bed the second i get home! Any who.... such is life! There is one other reason that i have not posted in a few days but I will explain that tomorrow! 

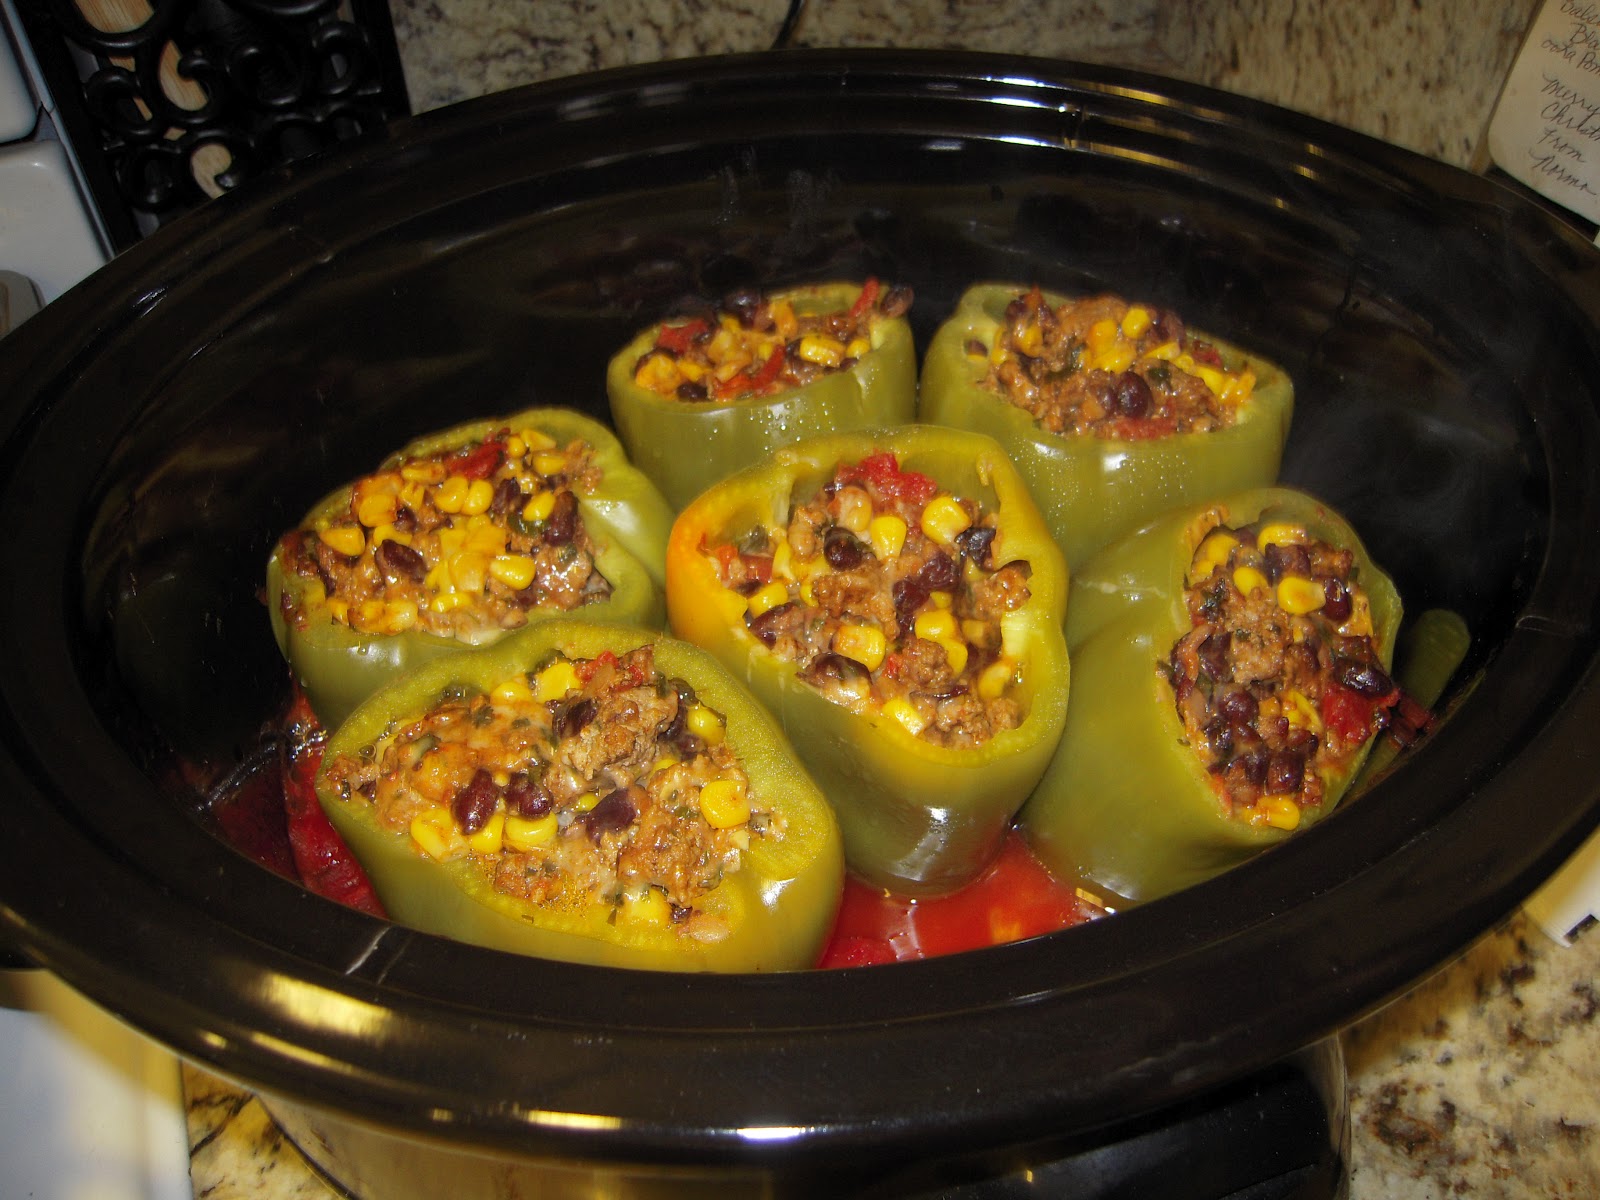
So tonight is the end of a long day and I thought I would link up with Six Sisters again to show off the FABULOUS stuffed bell peppers i made last week! I (of course) found the recipe on Pinterest (just click the picture below to head to the yummy recipe on Katrina Runs). So if you like what you see please feel free to try for yourself! 


Here's my review of the recipe: 

  • I accidentally skipped mixing the rice into the stuffing and this recipe still turned out great! WE just had a small amount of rice to the dish before we plopped down each pepper!
  • 1 pepper makes a great meal - even without the rice!
  • Hubs really liked this meal and I went with less rice to lower the carb count! 
  • I really enjoyed the cilantro that was in the stuffing! It added a ton of flavor! 
  • My one addition is to put some salsa on top! Boy this made it even yummier! 
  • I made six peppers in my crock pot for three full nights of dinner for two! This is a great head and store recipe that can make coming home from work to cook a whole lot easier! I know some do not like to eat the same thing twice per week, but there are so many benefits to planning meals this way. There can also be a bit of variety added to recipes during the week even if it is the same dish! However, i get it, some people get sick of eating the same thing twice, but this works for us! Besides it really can be a bit cheaper and leftovers get frozen!
  • Don't be afraid to use a few extra tomatoes with this recipe. I had a larger can on hand and it worked out fine! 
  • Next time i may even add a can of diced chilies! 
  • The green peppers were good, but next time i think i will try a sweeter pepper! I want to try yellow or red to make the dish a little more sweet! For some reason cooked green bell peppers do not always hit the spot with me, but yellow, red, and orange really make a salad, soup or dish that much better! 

Here's what my cute little peppers looked like going into the crock pot: 
And what they looked like while they cooked! Don't they look snug as a bug in a rug?

What did you have for dinner this week? How do you stuff your peppers?
I hope everyone is having a great weekend!
Photobucket

Sunday, February 19, 2012

Breakfast on the Go! Yum! (plus a sneak peak!)

So after fiddling around on this little blog last night ... APPARENTLY I deleted my post from yesterday on delicious breakfast. So i am breaking a rule and posting twice today! I was so mad at myself for not being more careful, but alas I know the recipe for breakfast sandwiches like the back of my hand! Besides it gives me a chance to show off the new signature one day early! 


This was also my link up post... so i am fixing my link as well! 

Head over to Six Sisters Stuff to see all the lovely links! 

My husband and I really love these little handfuls of warm and tasty goodness every morning! This recipe makes a bunch, so make sure you have enough room in your freezer if you would like to try these out. Also, a toaster oven is probably the best and quickest way to reheat/toast these little yummy handfuls! 

Here's what you will need:
A dozen eggs
1 Cup Shredded Monterey Jack (optional)
2 loaves of bread (whole grain preferred)
Sliced Cheese - enough for one for every slice of bread
Lunch meat, cut in half - enough for 1/2 slice per slice of bread
Salt and Pepper
Additional Items:
Saran Wrap to wrap individual sandwiches 
Parchment paper  

Let's make the sandwiches!
Begin by scrambling the eggs. All of them! You will feel like you are feeding an army, but this makes quite a few sandwiches! Here is also where you can add the shredded Monterey jack cheese. I add this because it helps the egg to stick together and who doesn't like cheese?!?
 You found me out - this time i used more than a dozen eggs. When i have a few extra eggs i throw them in the mix too!
At this point I usually will set the scrambled eggs in the fridge to cool them a bit. Sometimes i even scramble the eggs the day before. This cuts down on the prep time a little when you go to put together the sandwiches. But cooling the eggs helps to make the eggs stick together a little bit better. I do this for the mess factor and also so i dont burn my fingers as I spoon the eggs onto the sandwiches!

The next step is to put out the parchment paper and to cut the bread slices in half. Lay the slices of bread out on the counter. 
 
Then you can begin adding the cheese slices and then the lunch meat. For the sliced cheese I use a tray that is meant for party trays, but it helps to add variety in the cheese. You could find your own type of cheese and slice it yourself to save on cost. Its up to you! 


After all the cheese and meat are added, you are ready for the eggs! I use a tablespoon to scoop the eggs on top of the meat and then add salt and pepper to taste right on top! 
Next, stack up the sandwiches and you are ready to wrap! 
 
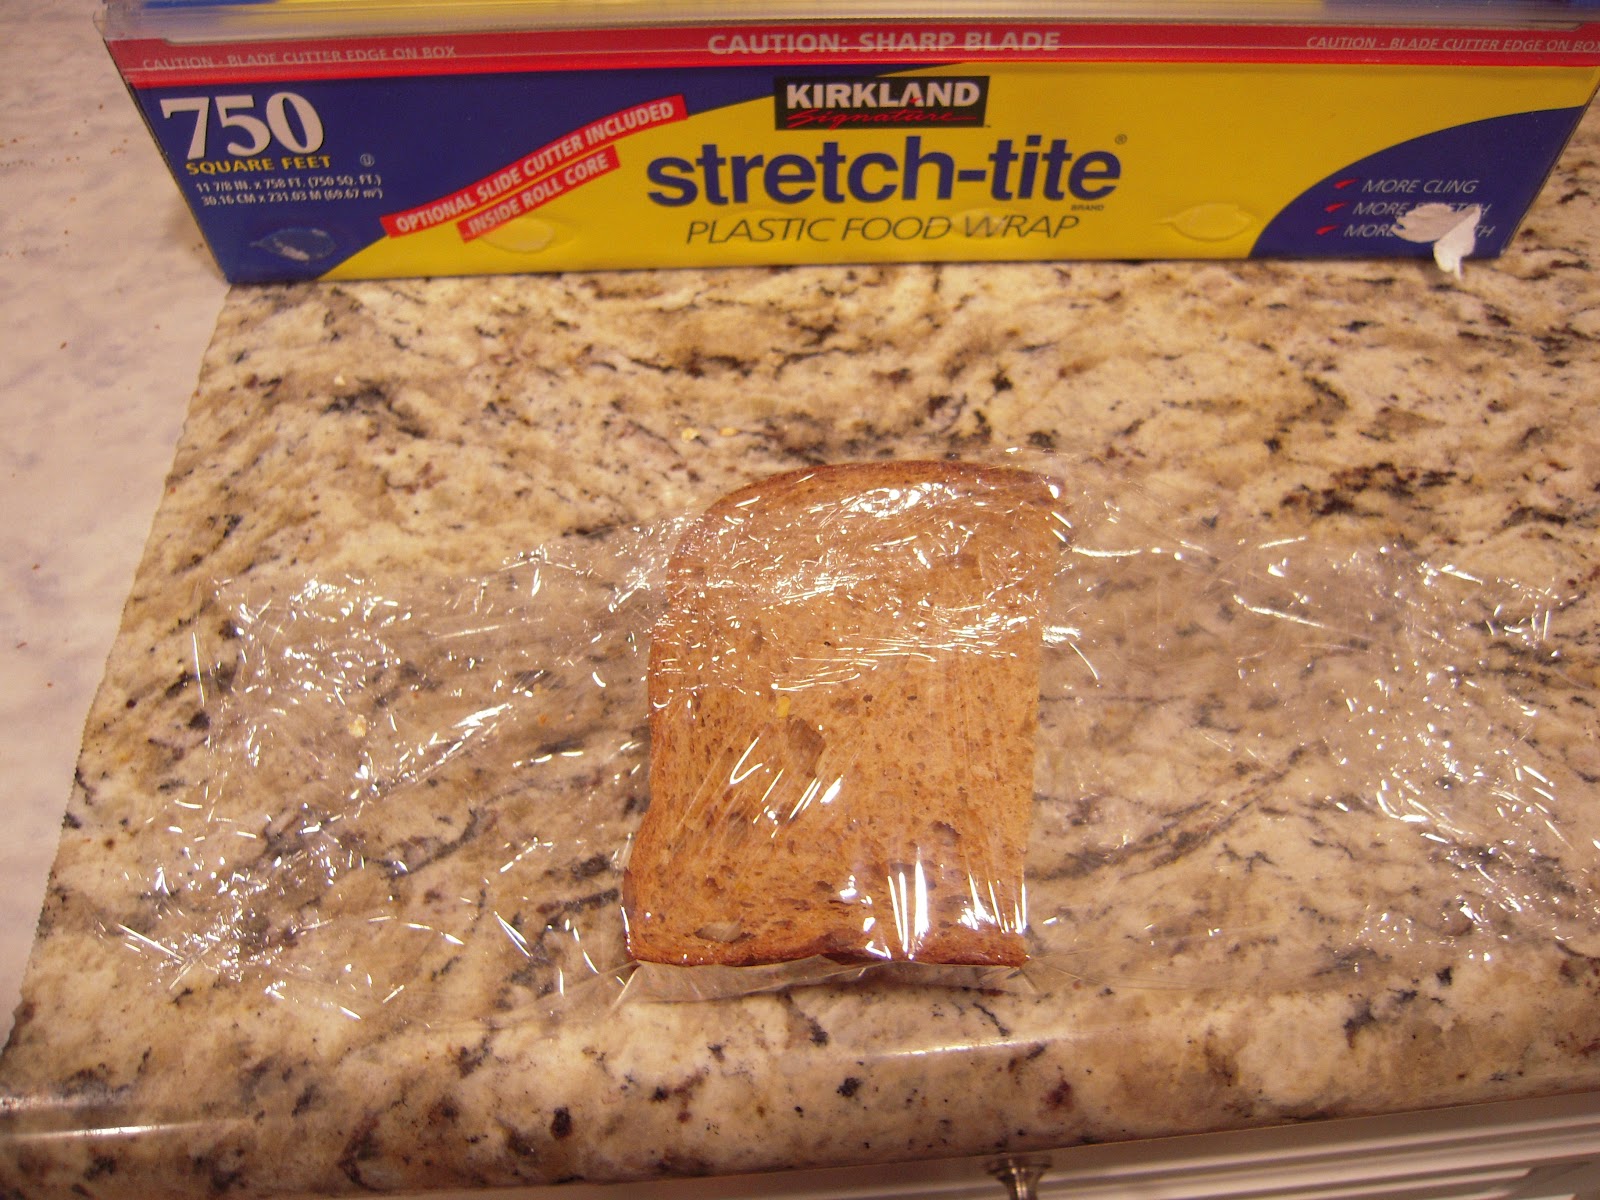
Once they are all stacked up, you can wrap them individually with saran wrap! I like to use the Costco brand saran wrap. It sticks the best, in my opinion. 

The next part is to stack them all up and head to the freezer! 

This recipe makes about 35-40 sandwiches and should last 2-3 weeks for 2 people, depending on how many times a week you eat these little warm yummies! 

Reheating directions: Defrost these by sticking them in the microwave with the saran wrap opened for 1 minute (for one sandwich) or 1 1/2 minutes (for 2 sandwiches). Then I flip them over and stick them in the toaster oven until evenly toasted on each side. Make sure to watch them the first few times you make these as they will burn and they will not be so yummy! 

So after all that... here's my new signature! Have a great Sunday! 

Photobucket

Recipes in Review!

I'm hmm-ing and haw-ing about what to post today... but here goes nothin'! 

So, after this busy week, i realize how nice it was to have meals already prepared! This week for dinner I made Pasta Fagoli in the crock pot as well! I made a couple of changes and this recipe turned out wonderful. My only real change was on the pasta. I shop at Trader Joe's (love them!) and they have a really yummy selection of dried pasta. I especially like the pesto filled tortellini, but this week i went with the cheese filled tortellini! They were delicious in this recipe. The other thing i did to make this great for dinner every night was to keep the pasta separate from the soup. So all my left overs are now going into the freezer into individual servings! They will be great in a couple weeks and I won't have to make several recipes at once! I have quite a bit left over too because we took my mom out for Valentines day! 


We also had salads for lunches this week and I made a yummy rice salad that we put on top of our salad greens and then added crock pot BBQ chick for a little bit of protein! I found the recipe for Crock pot BBQ Chicken here. The chicken recipe was delicious, but if you don't like too much spice, go easy on the pepper flakes! For my hubs and i the chicken was perfect! The brown rice salad recipe (found here) was delicious by itself! It would be a great item to bring to a summer BBQ and share with a bunch! The veggies were crisp and the spice just right! 

That is the week in review for the food coming from my kitchen! Now I'm off to go figure out what to make for the upcoming week. Hope you try one of these recipes! What did you make to eat this week? 

Monday, January 30, 2012

Taco Beans and Rice

YAWN....So slepy tonight! Its been a long day... i've been up since 4:30 this morning and i can totally swear i hear my bed calling! Can't wait! But i also do not want to neglect my blog! I guess the name of this little corner of the blogging world sums up my last few days. 

Tonight, I thought i would review what I have planned for meals for this week and then I thought i would share my lovely Saturday "girl's day" with a good friend! 

First, the meals we are going to eat... Our lunches will be from the lovely Girl Who Ate Everything. This week we are trying out her Fruit and Nut Salad in which I am using my candied walnuts (left over from my Christmas giveaway treat) and without the apples (mostly because I forgot to chop them up and include them into the baggies!) It will definitely be tasty either way! Maybe later on in the week i will decide to get rid of a few apples to put on the side! 

For our dinners, I will share a recipe that i have changed and altered based on my preference. My preference in this case would be: PROTEIN! It is originally a vegetarian recipe, but i add ground turkey. Without further ado...

Taco Beans and Rice

Pin It
What you will need:
1 1/2 lb ground turkey
3 large bell peppers (I like red, yellow, and orange) 
1 bag of chopped onions (approx. 2 cups)
1-2 15 oz. cans of kidney beans, rinsed
1 packet taco seasonings
2 cups brown or white rice, frozen or cooked by you!
Shredded cheddar cheese
Restaurant Style Salsa - as much as desired (mild, medium or hot - you choose)
Optional: 1/2 cup fresh tomatoes, Cilantro, tortilla chips, sour cream

Here's what to do: 
1. Brown the ground turkey in a dutch oven, making sure to break it into small pieces. While this is browning, chop the bell peppers. Once the turkey is beginning to brown up a little more and most of the pink is gone, put in all chopped onion and bell peppers. Let the turkey and veggies cook for about 5-7 minutes. 
2. Once the veggies have softened a bit you can add the kidney beans and the taco seasoning and let simmer  for another 10 minutes. 
3. Serve over rice and top with cheese and salsa. 
Optional: Skip the rice and scoop up with tortilla chips instead. You can also top with sour cream! 
Enjoy! 

Here's what it looks like:

Hubby said this was a particularly good batch. I think it was cause I happened to add a little bit of taco seasoning cause I had an opened package and an unopened package that I put in this time. He likes the spice! 

Ok... BIG YAWN!!! Off to shower and find my bed! 

PS. I did a little blogger planning yesterday! Excited about what's to come! Even got a pretty good idea of what I might do for a link up party! Gonna let it fester a bit to see which idea I like best! (Plus I gotta figure out how to do it!)


Monday, January 16, 2012

On the Menu

Hey there! Hope everyone who has the day off is truly enjoying their day off in remembrance of a GREAT man! I wonder what our lives would be like without Martin Luther King Jr. 


Any who, I have spent the morning grocery shopping and getting the oil changed on my car. The shopping was in preparation for the meal planning I have done for the week. What's on the menu this week? For lunch we will be having the Candied Pecan, Apple, and Gorgonzola Salad from The Girl Who Ate Everything. I love that blog and have found some great treats and healthy options because of her great blog! For our dinners I have altered a recipe that I found on Skinnytaste. (I felt I wanted some more veggies and also, a few more spices!!!) Here's my version of a crock pot veggie turkey chili.


Crock Pot 3 Bean Turkey Chili Ala Simone
Servings: 12 

  • 1.3 lb (20 oz) fat free ground turkey breast
  • 1 bag of onion, chopped
  • 3 bell peppers, seeded and chopped, any color will do (i used red, yellow, and orange)
  • 1 (28 oz) can diced tomatoes
  • 1 (16 oz) can tomato sauce
  • 1 (4.5 oz) can chopped chilies, drained
  • 1 (15 oz) can chickpeas, undrained
  • 1 (15.5 oz) can black beans, undrained
  • 1 (15.5 oz) can kidney beans, undrained
  • 2 tbsp chili powder
  • 1/2 tsp cumin
  • 1/2 tsp cayenne pepper
Topping:
  • 1/2 cup chopped red onion
  • 1/2 cup chopped fresh cilantro for topping
  • shredded cheddar to top 
Brown turkey, onion, and chopped bell peppers in a medium skillet over medium high heat until cooked through.
Drain any fat remaining and transfer to crock pot. Add the beans, chilies, chickpeas, diced tomatoes, tomato sauce, cumin, cayenne, and chili powder mixing well.
Cook on high 6-8 hours.
Garnish with onions, cilantro and cheese and enjoy!


This recipe is currently bubbling away in my crockie! I will take a shot of a bowl later tonight when i serve it up for dinner! Yum! So last week I promised a screen shot of my grocery list to go along with my meal planning. Here they are: 


Here's the app that I use on my iPhone to take my grocery list with me. This prevents me from forgetting my list at home and also prevents me from forgetting items. 
So as you can see, I have items on there ready to buy for my chili and as I added each item to my cart, all I had to do was touch the item and it disappears from the list. I do this every week and I think people look at me like I am texting and shopping, but it really does work for me. This app can be found for Android and Blackberry phones! What would we do without our smart phones? I hope my hint might work for you! 


Monday, January 9, 2012

Meal Planning Part 2

Today is COOK Day! Like i said yesterday, I cook on Mondays. So after a long day of work i usually want this to take the least amount of time possible. I truly try to make it take no longer than 2-3 hours including clean up time. If it takes longer i get really cranky after a long day of work and then crash after. 

I thought that today as I cooked I would document how I do this and package all my food (and my husbands too!). So on the menu this week is Bean & Sausage Soup for our dinners (Tuesday thru Thursday) and a green salad with whatever I felt like buying from the store this week four lunches Tuesday thru Friday. 

Tonight i began with the soup and this recipe was easy! It was made even easier by buying a few items that save on prep time. I buy mirepoix to save on chopping time. If you don't know what this is - it is chopped onion, chopped celery, and chopped carrot all in one container. This is not always sold prepared, but it is used to create a vegetable base to many soups. In addition to the mirepoix, I use my food processor to help slice, chop, or even blend things quickly. Tonight I do not know what I would have done without the food processor! 

Anyway, once the soup had gotten going, I  finished adding what was needed and skipped the spinach because I will be adding that on a daily basis. Soggy spinach doesn't excite me so, I figured it will be fresher if I add it each time I heat up a bowl. I then moved on to some Sassy Water which was a snap with the food processor. It literally only took me 5 minutes to make and the longest part of the process was filling up the HUGE pitcher with water.


Our salad for the week will have red onion, red, yellow, and orange bell peppers, with celery, grilled chicken, and some white cheddar cheese that is cubed. The greens consist of Romaine and spinach! We usually package our salad dressing the morning before we leave for work. The key to all of this is keeping the ingredients with the most moisture separate from the lettuce or anything else that should not sit in moisture until it is eaten. 


After the sassy water, I moved on to salads and started by filling 8 containers (2/day for 4 days per week) with romaine and spinach.


Then I packaged baggies with the chicken and the veggies. I made 8 baggies so we can easily take them each morning. 


The cheese came last and this time I used snack size baggies and packaged the cheese separately to prevent soggy cheese. Again, soggy = not yummy! 

In the end, I put the soup into one large container and stuck it into the fridge after I served my husband a bowl with fresh spinach! The soup got good reviews, so I hope you night try it some time! 


Hope you enjoyed reading!